Crash course on authoring Windows 7 Troubleshooting Packs
Published · Last revisedThis post first appeared on Within Windows on January 12, 2009.
New to Windows 7 is the Windows Troubleshooting platform. This platform allows software developers to develop Troubleshooting Packs that automate the troubleshooting and resolution of problems without having to resort to painful technical support queues or documentation runs. In a nut shell, a software developer writes a bunch of PowerShell scripts to identify and resolve problems then packages them up and distributes the pack to end-users.
At the end of this step-driven course, you will have used the Microsoft Troubleshooting Pack Builder (TSPBuilder), written some PowerShell scripts, and learned of a way to distribute your compiled pack.
Step 0: Watch PC50 presentation, learn some PowerShell
Rather than rewrite everything covered by Ricky Buch, a Program Manager on the Windows Instrumentation Team, I’m going to make watching/listening to this presentation a mandatory prerequisite. I apologize in advance to the hearing impaired, Microsoft isn’t in the habit of captioning their video content.
If you have existing coding experience, truck on. If you don’t, you may want to take a time out and watch a webcast on PowerShell.
Step 1: Get the right tools
You will need to install the Windows 7 beta SDK and be on Windows 7. Pretty standard stuff, both free. A number two pencil will be provided for the final exam.
Step 2: Identify the problem(s) you want to fix automatically
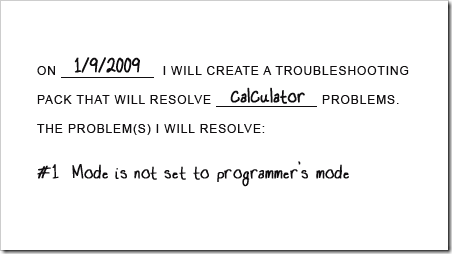
Don’t make the same mistake I did and jump right into the building process without having a clear and written understanding of the problems you want to detect and fix. This will save you hours of frustration later and make you feel warm and fuzzy for having a plan on paper.
Step 3: Carve out the package
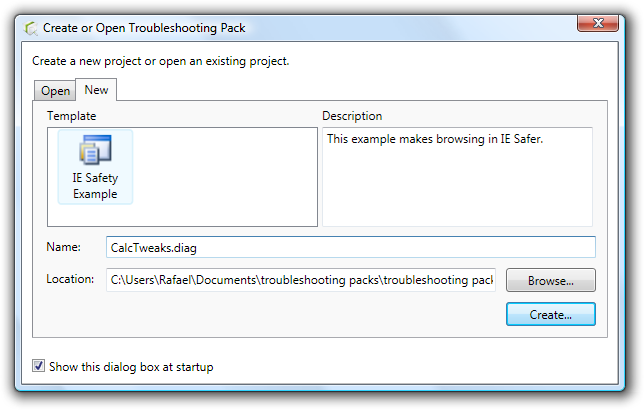
Fire up TSPBuilder.exe, located in [SDK Installation Path]\Bin\TSPBuilder. You will be presented with a Create/Open dialog. Unfortunately, in this build of TSPBuilder, there is no blank template so we will build off of the provided sample project. Review and change the package name and location, then click the Create button.
Tip: The name of this package should reference the overall goal of your Troubleshooting Pack, not a specific problem you will be resolving. This generalization will allow you to extend the supported problem list without search and replace headaches later.
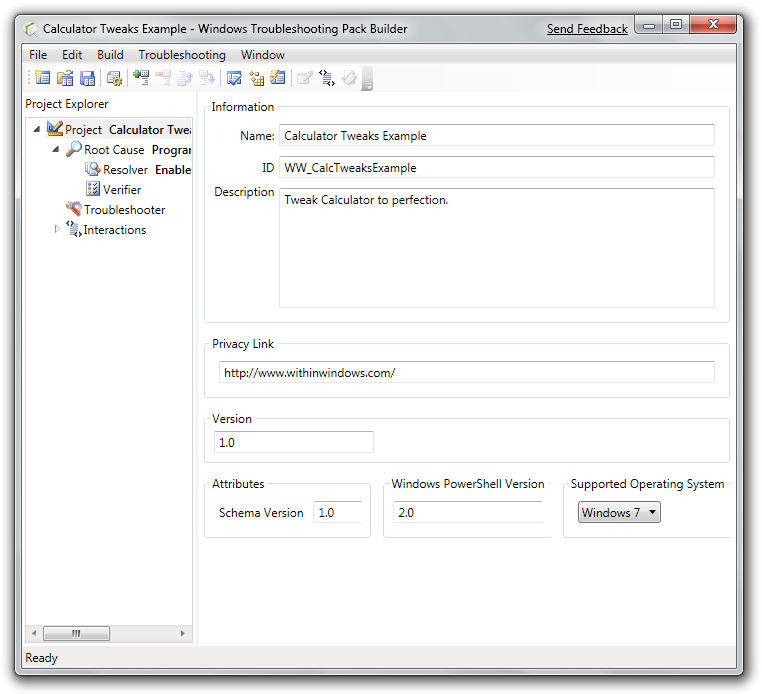
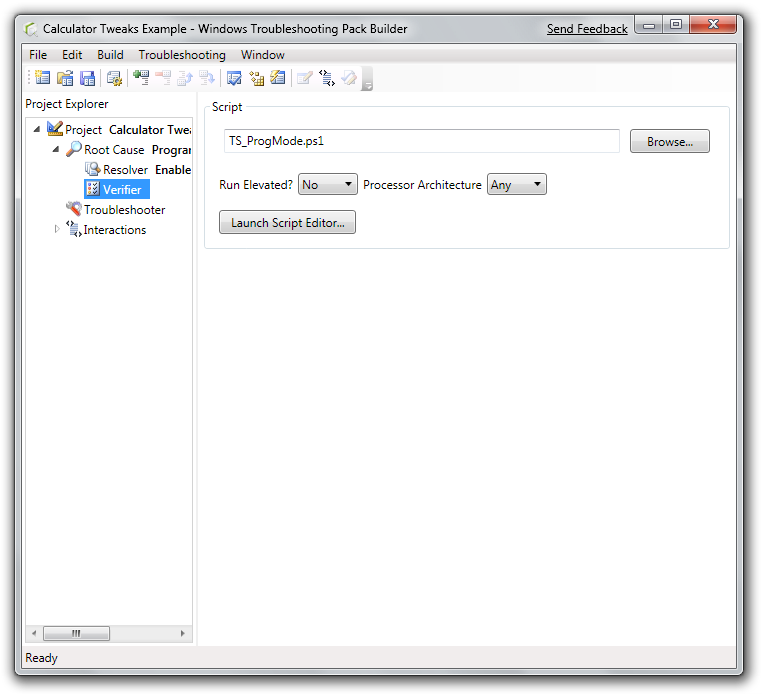
This is the main user interface that lets you specify all the logic and metadata to be associated with the pack. On the left, you have the Project Explorer pane. This pane displays the root project node, all the root causes (or problems) this pack supports, the associated Troubleshooter and finally any Interactions we need to make with the user. I won’t be getting into Interactions this go around. On the right, you have properties and values relative to the selected node on the left.
So what the heck is all this?
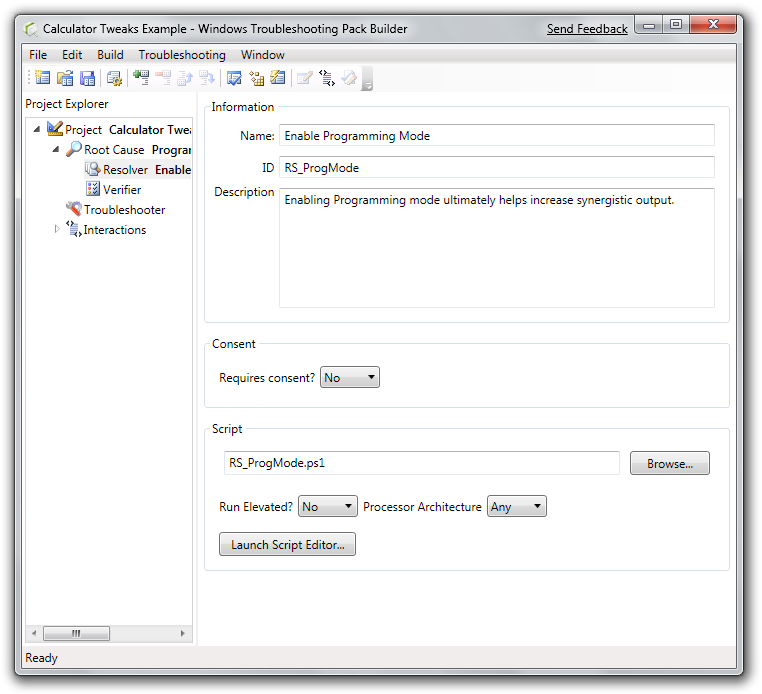
- Project – This is your Troubleshooting Pack. You will specify authoring metadata, such as versioning, supported platforms, and a description on this node.
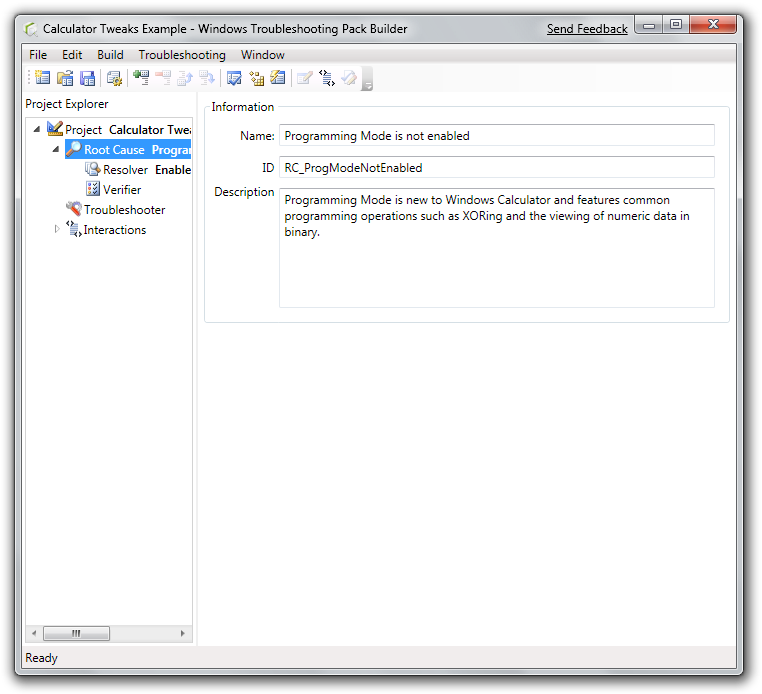
- Root Cause – Each Troubleshooting Pack has N number of root causes (of failure). You can think of these as problems, too. During the execution of our Troubleshooter script, we will alert the Troubleshooting Engine of root causes we detect via a fictitious alpha-numeric identifier. Each Root Cause has an associated resolution, or Resolver, and steps to verify the problem was resolved, or a Verifier.
- ... Resolver – An action/script that will resolve the associated root cause of failure.
- **... Verifier – **An action/script that will verify the associated root cause of failure was resolved. Confusingly, Verifiers are also used to detect Root Causes. It is easier to think of Verifiers as “detectors”.
- Troubleshooter – This is the entry point of your Troubleshooting Pack. A Troubleshooter script will house logic to execute N number of Verifiers to detect Root Causes. Detected Root Causes will be presented to the user and ultimately be resolved via Resolvers and verified via Verifiers again.
Terminology out of the way, go ahead and delete/modify the sample project nodes ensuring you have at least one Root Cause. I recommend customizing the package in the order of its execution -- that is Troubleshooter, Root Cause(s), Verifier, and finally Resolver. Don’t worry about creating script files right now. Just specify the filenames.
Tip: Specify IDs with the proper prefix to ensure things are easier to script later. TS for Troubleshooters/Verifiers, RS for Resolvers, and RC for Root Causes. Verifiers are the odd ball here because they’re executed by the main Troubleshooting script at multiple times (to detect and to verify). Changes in the naming would be welcome before RTM.
Step 4: Write the scripts
The Troubleshooter Script
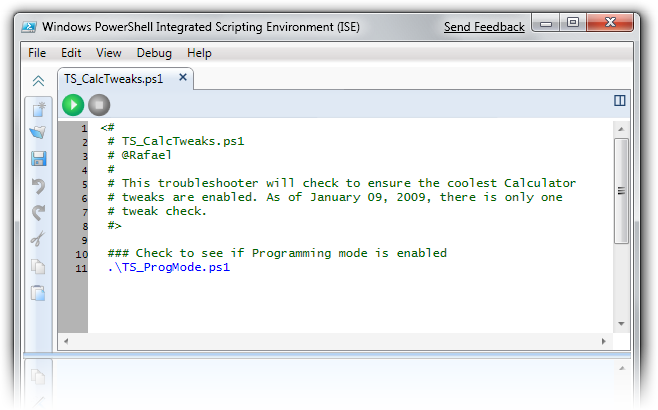
With the package metadata out of the way, we can now focus on writing the logic behind our Troubleshooting Pack. Start with our entry point, the Troubleshooter, and click the Launch Script Editor button. Notepad will launch and ask if you would like to create the script. Click the Yes button then close Notepad. Afterwards, click the Launch Script Editor button again and the proper PowerShell Integrated Scripting Environment (ISE) will fire up.
As mentioned several times already, the Troubleshooter is our entry point in this pack. This script should be relatively simple; it should execute each Verifier script to determine if there’s a problem or not. In this case, I wrote a line of code that just executes the Verifier that detects whether or not Programming Mode is enabled.
The Verifier Script
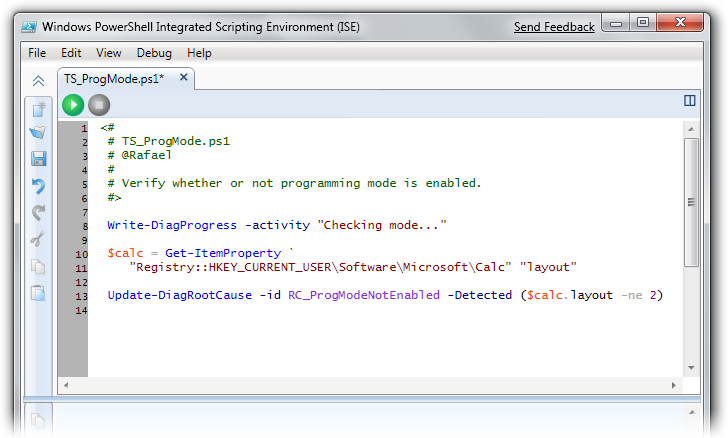
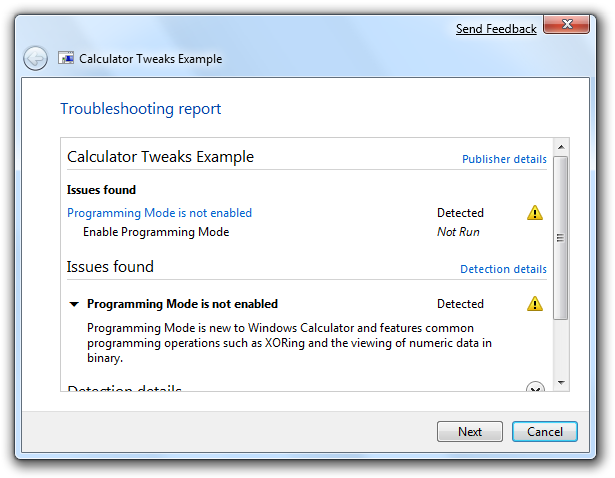
Following the flow of execution, move on to the first Verifier script. This script will detect a single problem and report to the Troubleshooting Engine whether or not a problem was detected and should be presented to the user for resolution. Important PowerShell cmdlets in this script are Write-DiagProgress and Update-DiagRootCause.
Write-DiagProgress- This cmdlet allows you to provide status information back to the user via the Troubleshooting Wizard UI.
Update-DiagRootCause - This cmdlet is used to report back to the Troubleshoot Engine whether or not a particular problem (identified by ID) was detected.
In my project, the script is pretty simple. I simply inform the user as to what I’m doing, check the value of the layout DWORD in the registry, and report back whether or not it’s set to the value 2. The expression in parenthesis is evaluated to either $true or $false and is passed in as the value of the Detected argument.
The Resolver Script
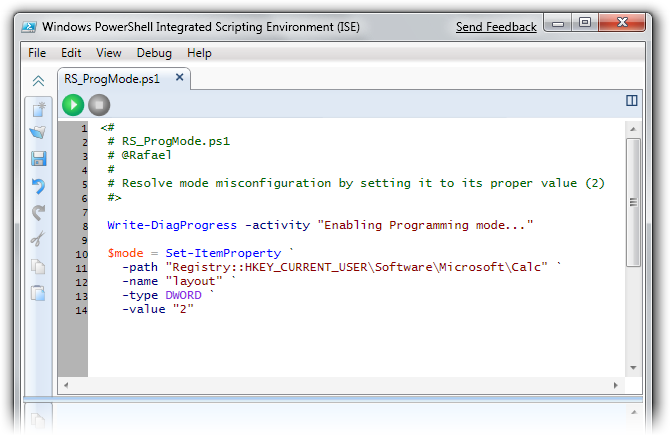
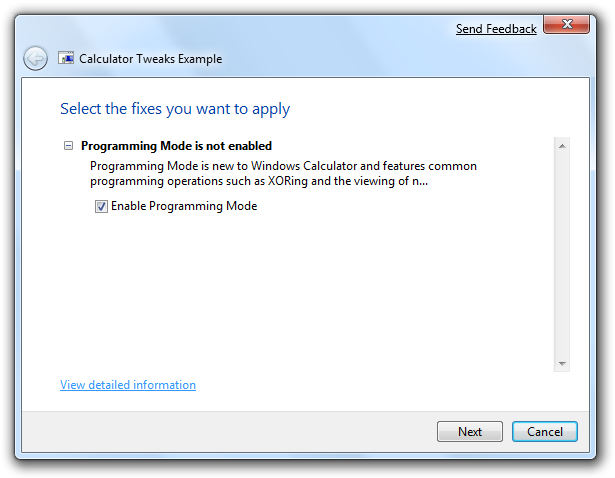
Finally, move on to the Resolver script. This script will only execute if the Troubleshooting Engine was informed the associated Root Cause was detected and if the user specifies to fix the problem via the Troubleshooting Wizard (the default is yes). In my project, the script simply reports a status to the user and sets the registry DWORD value’s data to 2. After execution of this script, the Troubleshooting Engine will re-run the Verifier script to verify the fix.
Step 4: Build and test
At this point, you have created a Troubleshooting Pack project, specified metadata to be associated with the pack, and created scripts to detect Root Causes that will be corrected with Resolvers and verified with Verifiers. At this point, all the hard work is done.
Compiling and testing Troubleshooting Packs in TSPBuilder is easy. Simply click Build -> Compile. TSPBuilder will automatically gather all your scripts and digitally sign your pack with a test signature (required).
Tip: After you verify and validate (V&V) your Troubleshooting Pack, make sure you re-build the pack with a real certificate. Deploying packs with test signatures is embarrassingly sloppy, requires users to manually trust certificates, and may not be supported in Windows 7 final.
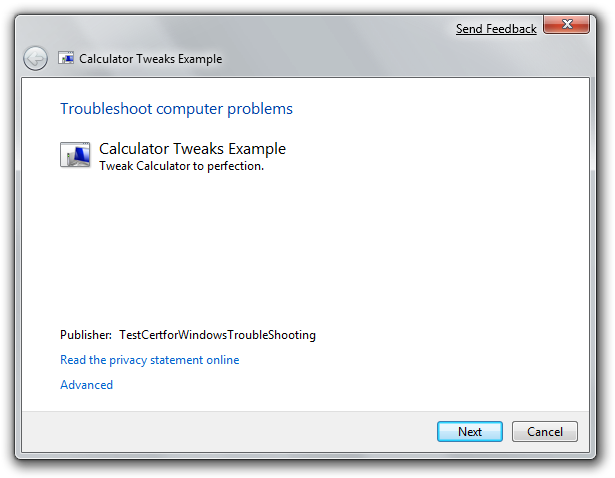
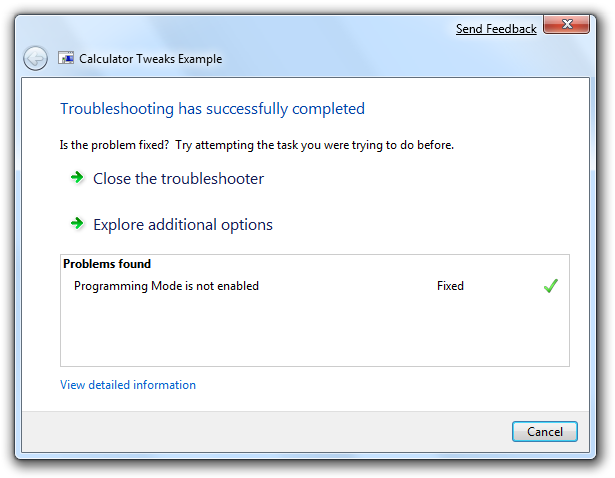
If all goes well, click **Build **-> **Run **to test your shiny new pack (or manually double-click the output package). The Troubleshooting Wizard UI should appear with the metadata you specified in Step 3.
Congratulations, you’ve built your first Troubleshooting Pack! Sadly, everything you just learned will be completely changed in the final product... just kidding.
Loose end #1: Debugging scripts
As your Troubleshooting Packs become more and more complex, the need to test scripts on-demand, in the PowerShell ISE, increases. Out of the box, the Troubleshooting Engine cmdlets do not exist. Thankfully, you can add them in by executing TestModeSetup.ps1 in an elevated Powershell environment, an exercise left for readers.
Loose end #2: Testing/deploying onto other machines
As mentioned above, TSPBuilder automatically generates a test certificate and signs your pack with it. Behind the scenes it also imports this certificate into your trusted certificate store enabling you to test the pack immediately. If you want to test the pack separately on another Windows 7 machine, you will need to fish out the generated .cer, deploy it with your package, and import it into the trusted store manually.
Loose end #3: Documentation
As with most pre-release/beta software, documentation is scarce. In fact, there is no documentation whatsoever in the SDK regarding TSPBuilder or Troubleshooting Pack authoring in general so you will need to adopt the figure-things-out-by-clicking-buttons approach until MSDN is refreshed.